
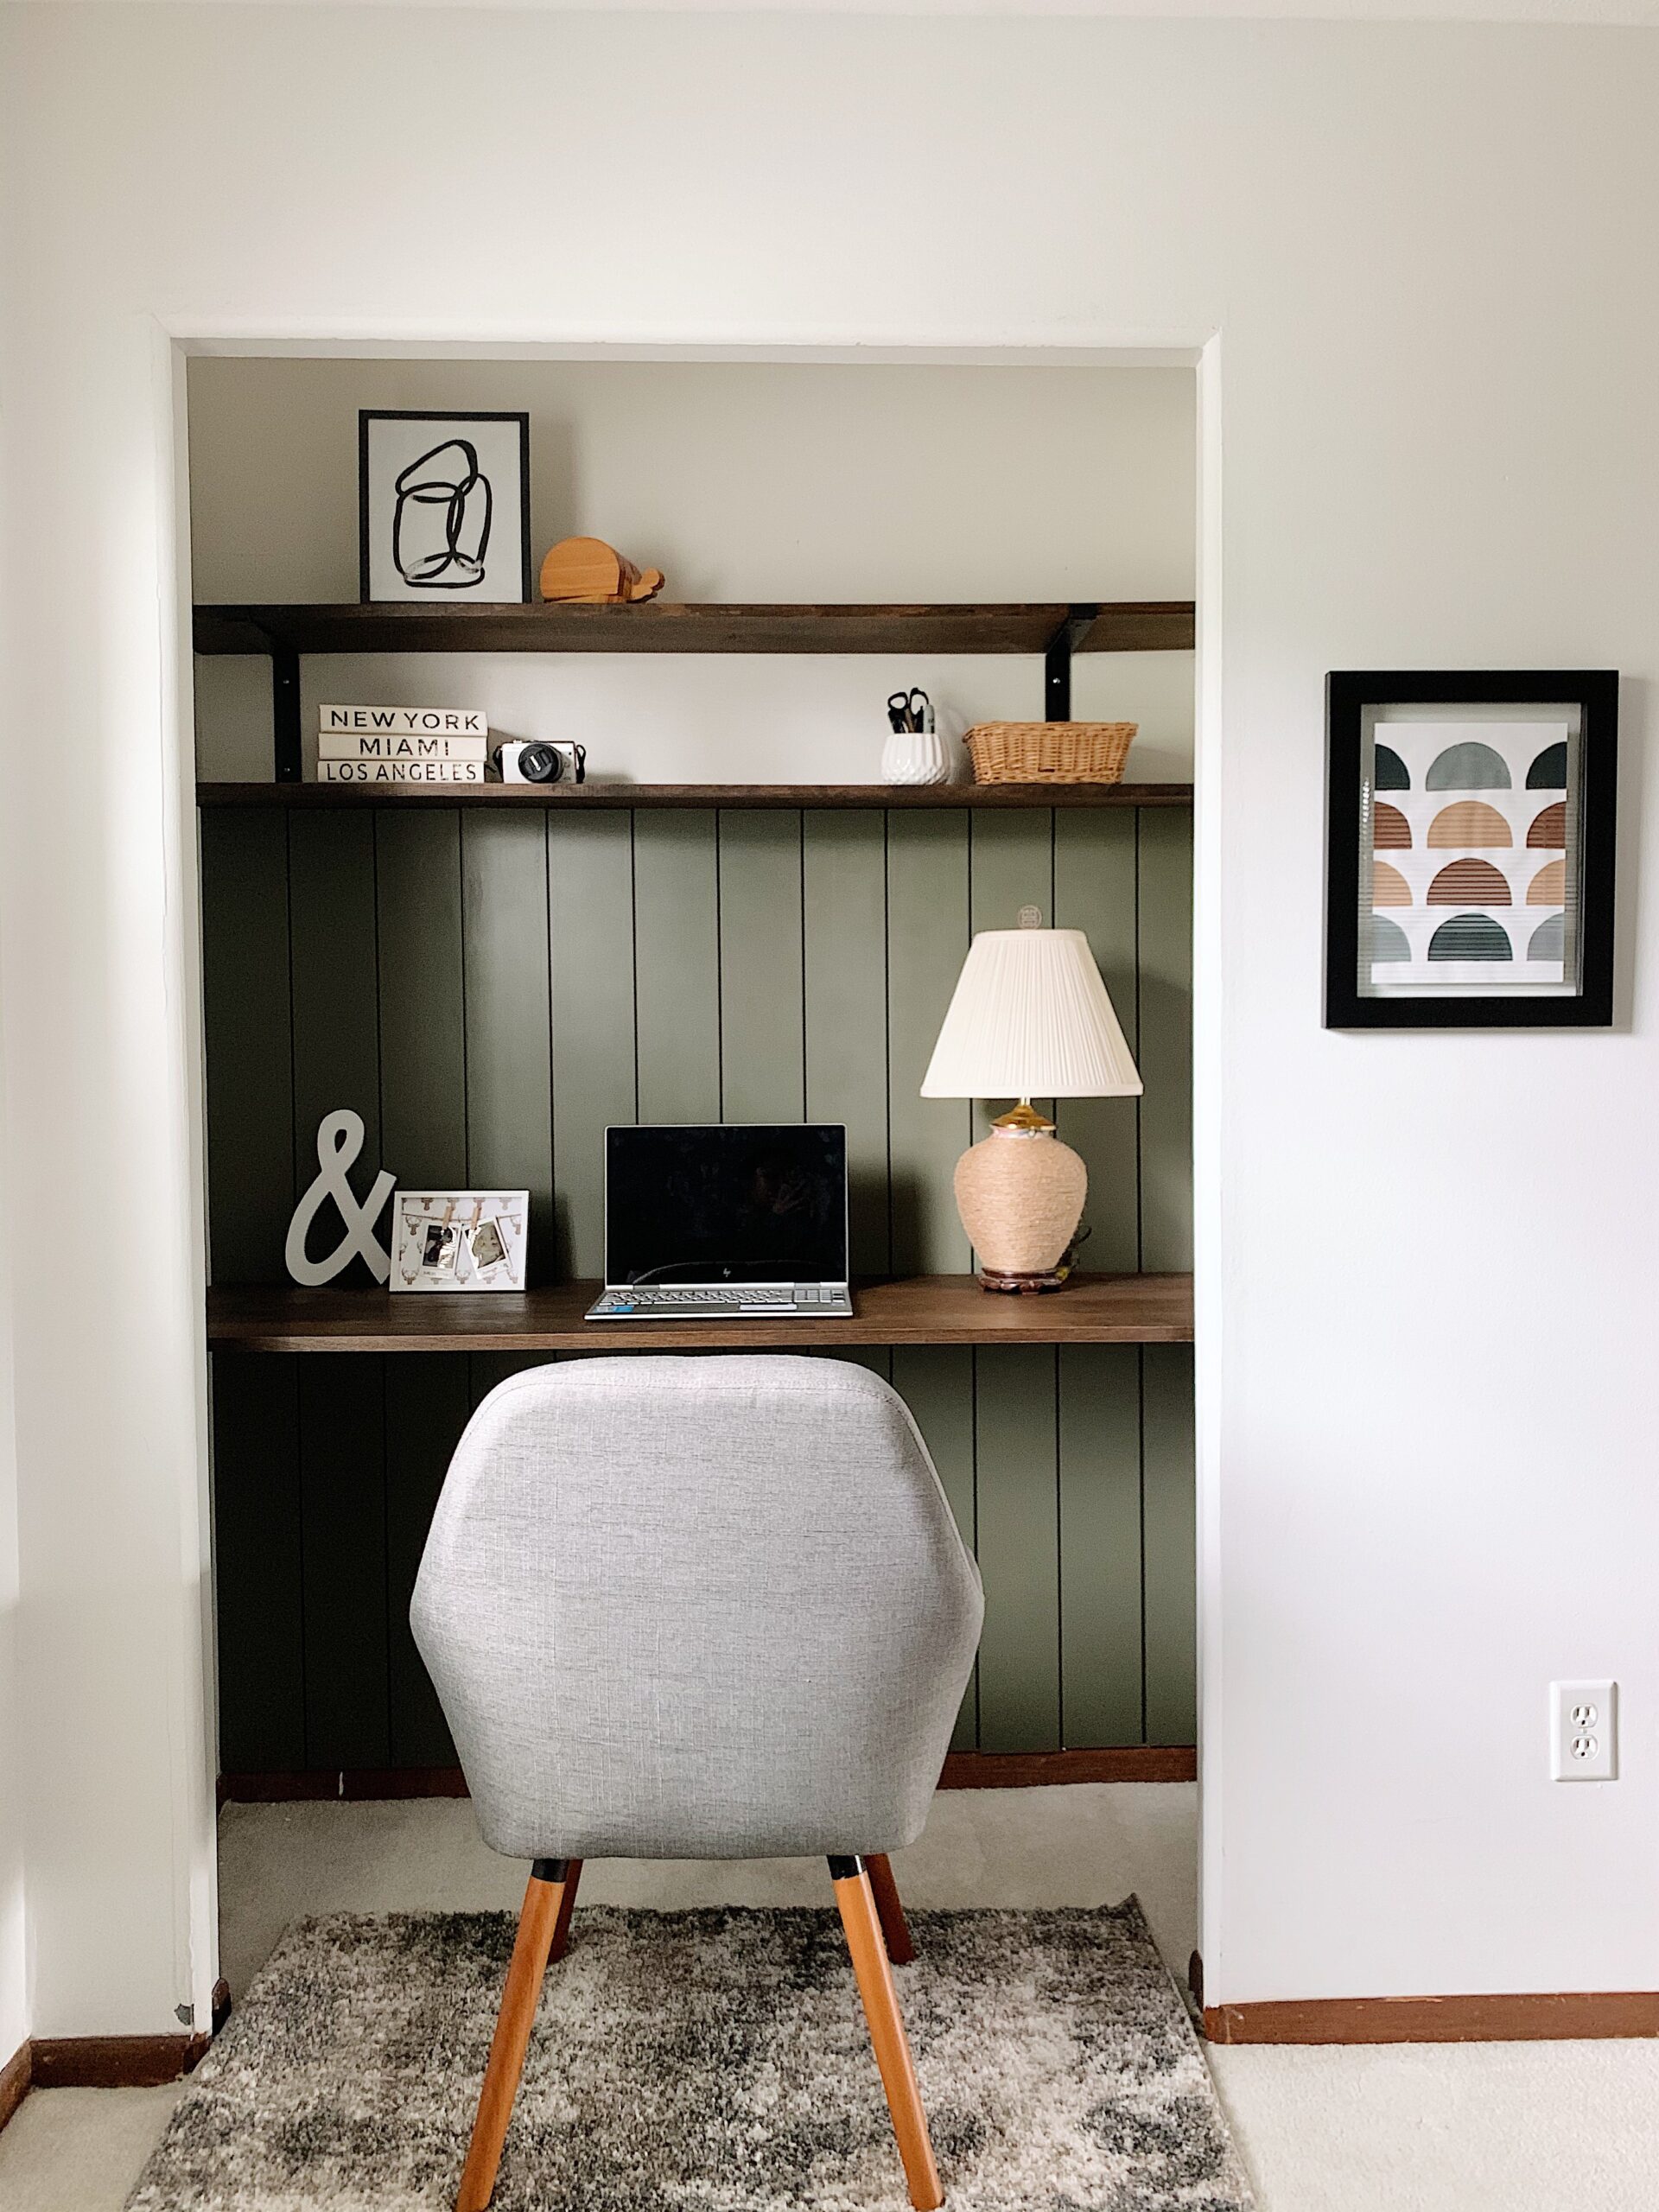
Last April 2020, I wanted to make use one of our spare closets in the master bedroom and transform it into a functional space for us. Hence the office nook was planned and built! Let me take you on a journey on how we transform a closet into an office nook.
I was only 20 weeks pregnant when I thought and imagined a space where we can sit and actually have a relaxing time doing stuff on our computer or laptop. When we did our master ensuite bathroom, we agreed to make our 4th bedroom which is super tiny in size to be a walk in closet, so all of our clothes and stuff are in there. But we have his and hers closets in our bedroom which we don’t know what to do with, so I thought of making one of them a place for our office stuff.
This was a month-long project because we don’t have all the tools like a table saw for cutting down our boards and a nail gun. This was also based on a small budget that we have.

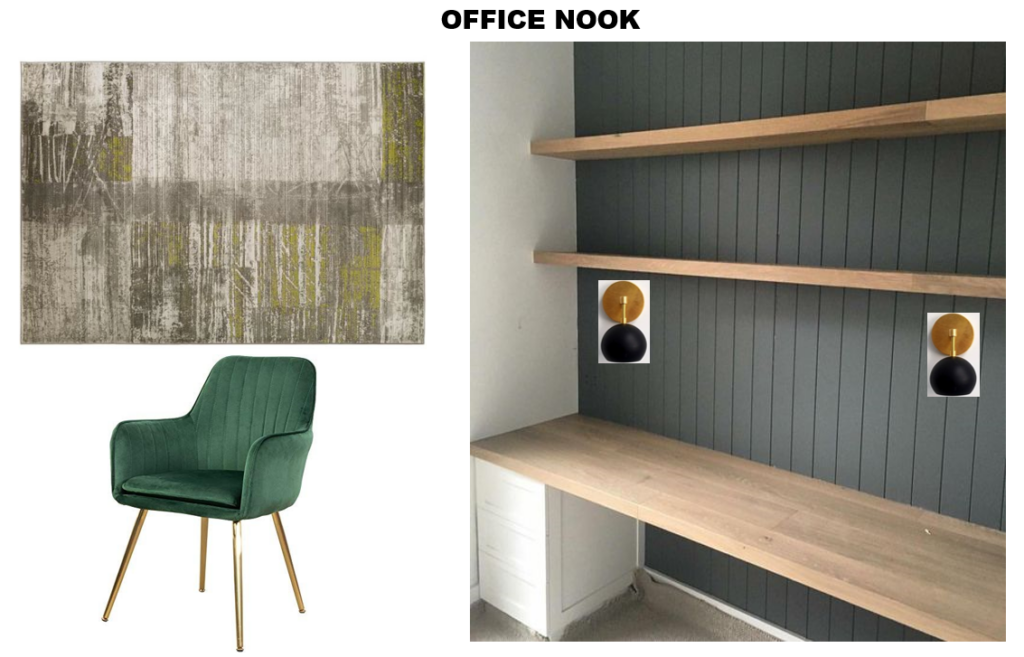
I made a sketch on my mind of what the space is going to look like. I listed all the materials we’re going to be needing for this transformation. Eventually, I made a mood board for this project to help my husband understand and have a clear vision of what it’s going to look like, so that we are both on the same page design-wise.
Materials used:
- MDF shiplap boards (pre-cut by Home Depot into 4 ft long)
- Liquid nails or Gorilla wood glue
- Paint – Sherwin Williams “Eclipse”
- Paint roller
- Painters tape
- Pine boards (pre-cut by Home Depot into the size we want)
- Walnut stain
- Shelf brackets
- Drill
- Stud finder
THE PROCESS
First off, we took down all the shelves, clothes rail, hooks, and the sliding doors of the closet. I wish I took more photos in between the process. Anyway, here is what the closet looked like before we took down everything in it.

We removed everything you see in the picture above including the white shelves. Then once we got all of those out, we painted the inside of the closet with a basic regular white paint because there were so many marks or scratches on the walls.
It seemed like we had a completely new closet after painting it! We, then, went on to put the MDF shiplap boards on the wall. Just a reminder, we did not have a nail gun onhand and we don’t have the funds to get that tool yet. So, we used liquid nails to attach the boards onto the wall! Yes, and it DID worked! I was kind of worried that maybe it would fall off from the wall since we are placing the boards vertically against it.
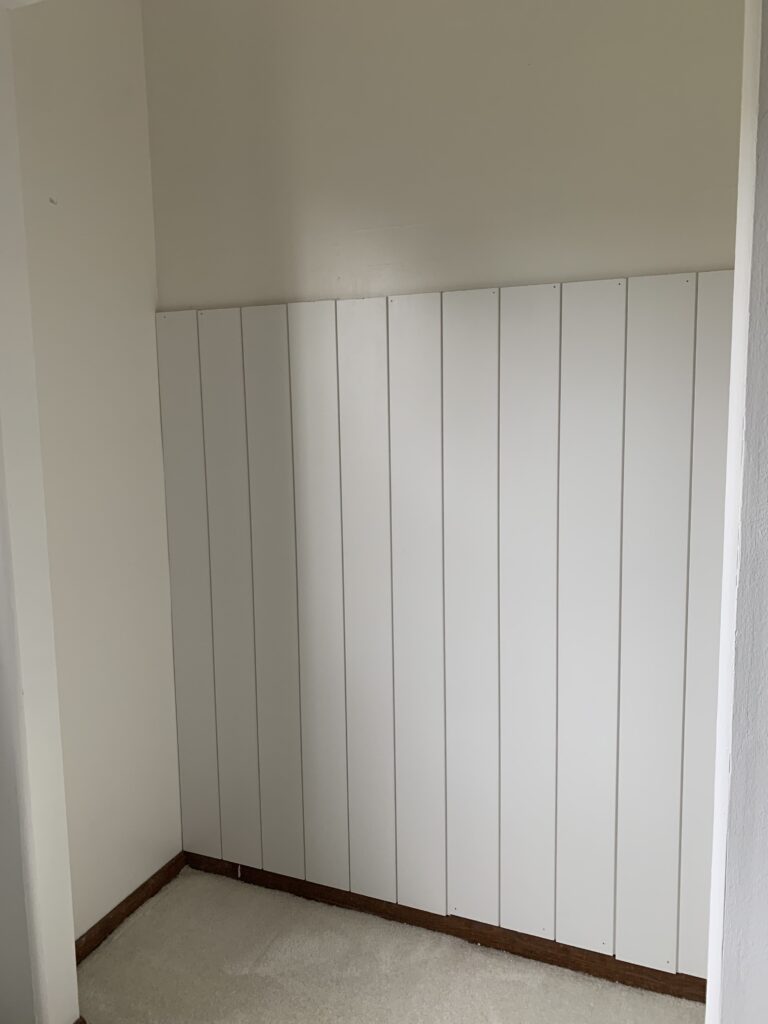
I got super excited that the liquid nails and some Gorilla wood glue really worked well with the MDF boards. WE basically just pasted them on the wall.
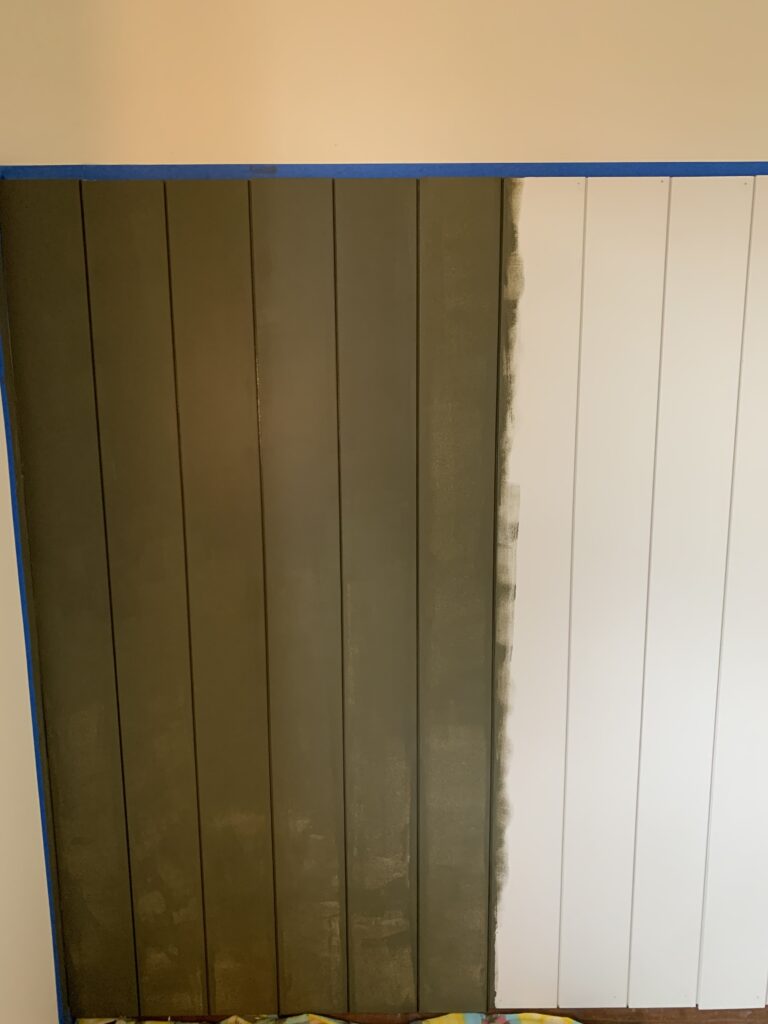
Now we go to the FUN part of this project which is “painting”! There are a lot of really nice and beautiful colors out there so I gathered some paint chips from Home Depot.
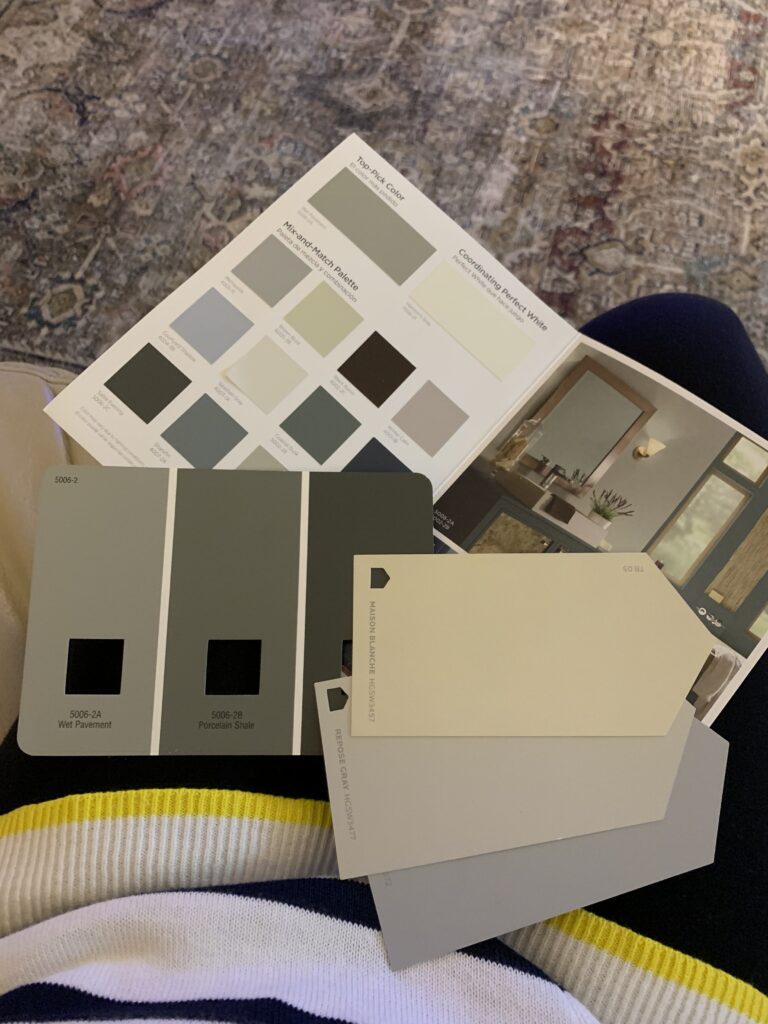
I probably had a good 5 days just to choose a color for the shiplap boards. I wanted something green but there were so many great options I find! But after days and hours of contemplating, I finally chose the perfect shade of green! It’s called Eclipse by Sherwin Williams! It has hues of army green, gray and a hint of brown.

I started painting on that day when we got the paint. We only bought a quart size because there were only a few shiplap boards we’re painting with this color.


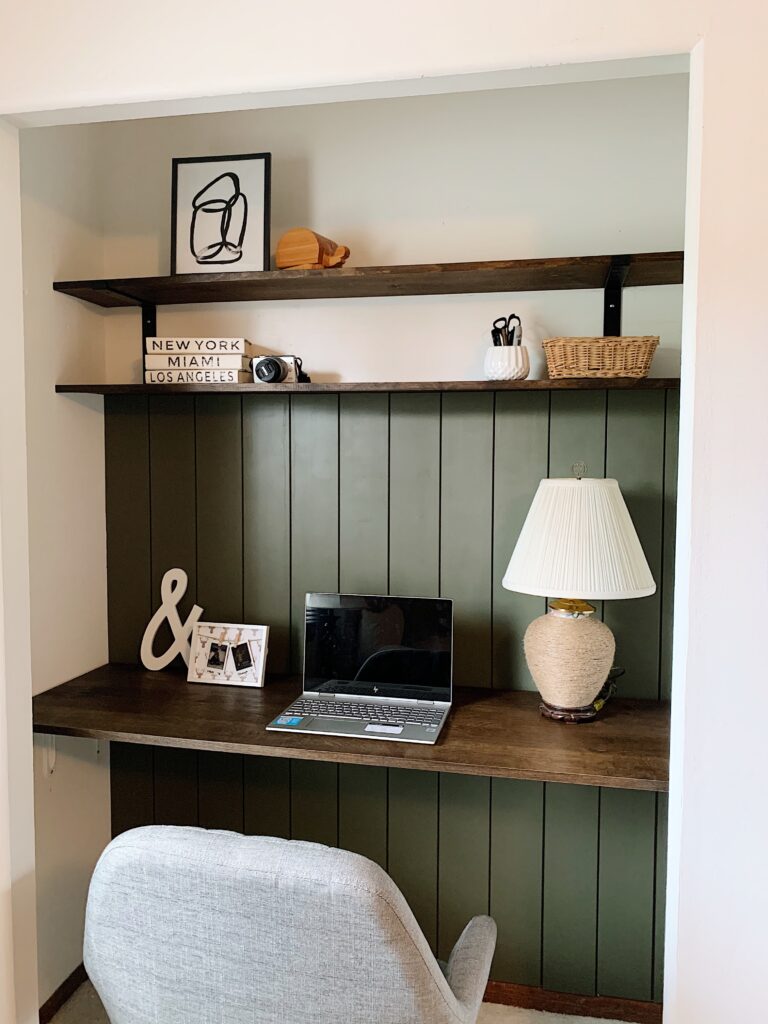
The next step was to measure the size of the wood we need for the shelves and the desk and also figure out what type of wood we need to get. As for the desk, I was planning on making it a floating desk and use shelf brackets on the left and right side of it, so that I don’t ruin the beautiful shiplap wall.
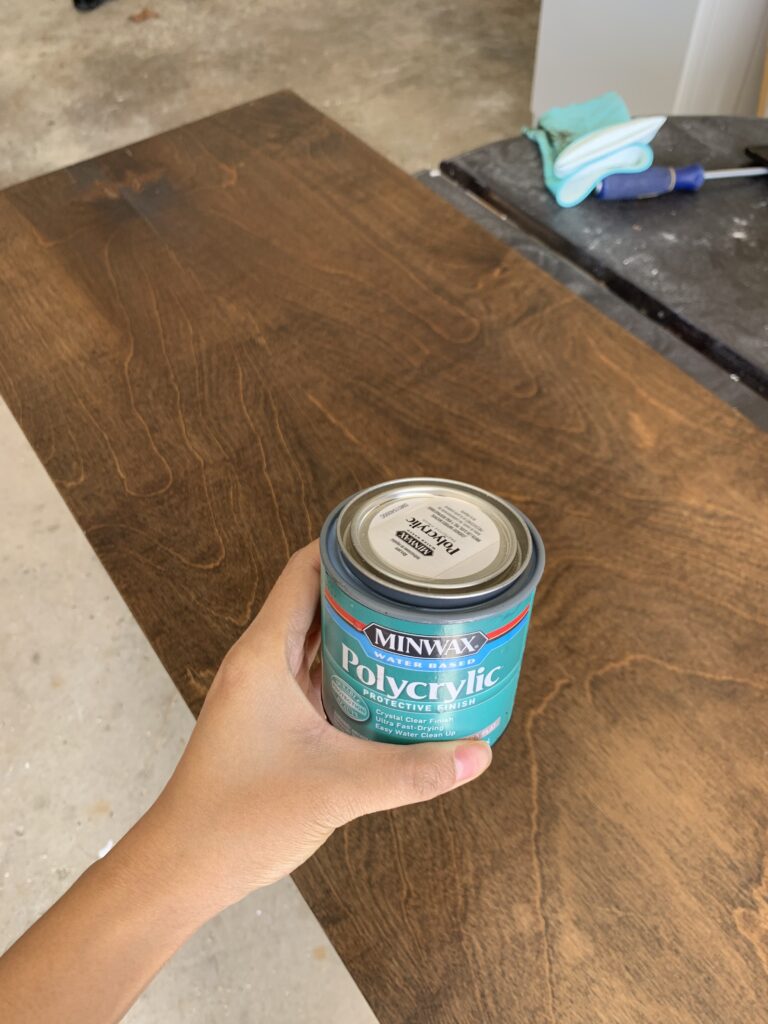
After researching what type of wood we need to use for the shelves and desk, we came to a conclusion to use a pine wood. Since we will be staining them, the type of wood that really adheres to stains is pine.
Pro tip: When buying wood, ALWAYS check the wood in different angles for alignments and to make sure the wood is not crooked.
This tip really came in handy when we were buying the boards.
We had Home Depot cut the wood in the size we wanted because we do not have or own a miter saw or a table saw. We sanded them down lightly to make sure the stain will sit through the grains of the wood. After that, we went on and stained them and applied a top coat to finish it up!
I wasn’t able to take pictures of how we hang the shelves and make the desk but I made a story highlight on my Instagram page of how we did it. Click here.
When hanging the shelves, we used a stud finder to locate the studs on the wall. We used shelf brackets for the top shelf but with the lower shelf, we made pocket holes and hooked the shelf onto the studs so it is sturdy on the wall. As for the desk, we used shelf brackets but instead of placing the brackets against the shiplap wall, we hooked them up on the sides (left and right). That way, we are not drilling holes on the shiplap wall.
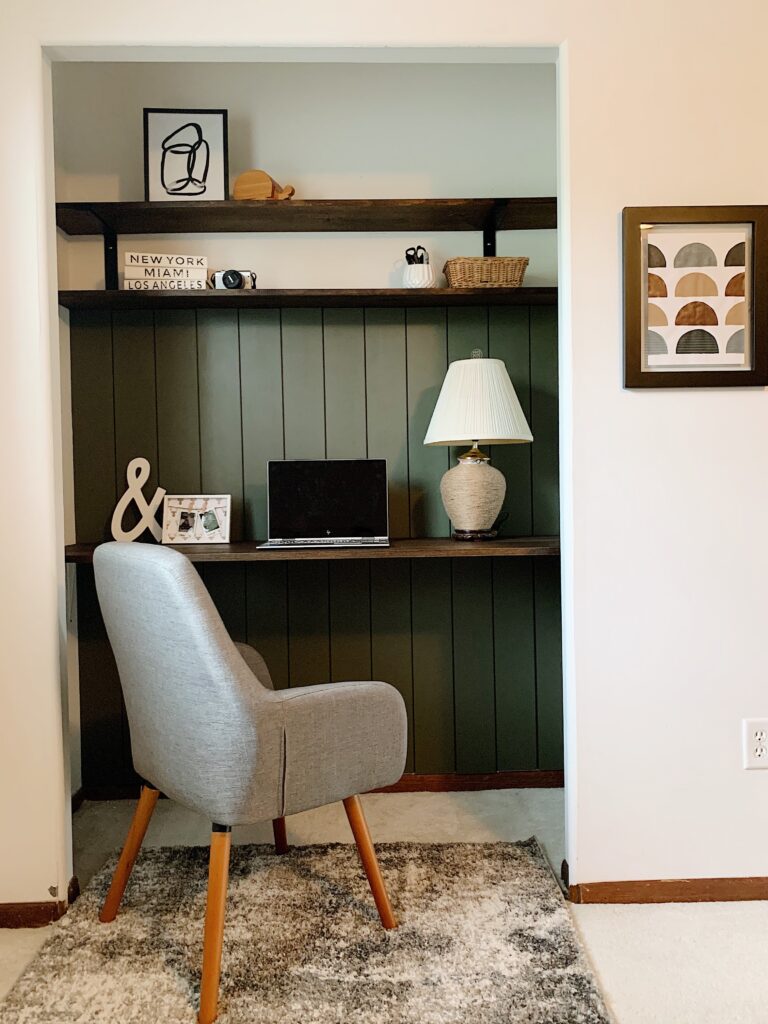

This was my first ever DIY transformation and I cannot believe how awesome it is! I am in love with how beautiful this closet space has turned out! I hope you find this project of mine helpful and inspiring.
See you on the next one!